

On all orders before 3:00pm over £150


On all orders before 3:00pm over £150

Single Knowledgeable Point of Contact

Live Stock & Wholesale Pricing

Mon-Fri 8:00am – 4:00pm
As a pro tiler, you’ll know the importance of preparing and priming the substrate in order for tiles to stand the test of time. You’ll know you can’t risk not using an adequate primer for waterproofing and tanking wet environments: that’s why we have a wide selection of high-quality preparation products to choose from.
With our selection of priming products such as quartz primers and SBR primers, tiles are sure to adhere quickly and effectively to prevent future delamination. It also goes without saying that you can’t have these primers without our handy preparation accessories, such as our waterproofing kits and trays with rollers. Get stuck into our wide range of priming products for your next tiling project!
If you’re a pro tiler, you’ll understand just how important it is to prime tiles before beginning the installation: it's best practice for seamless tile finishes. We sell a variety of primers and preparation products to assist with the installation of many tile applications, all of which are handy whether you’re a pro or a beginner tiler. Many of our accessories help with waterproofing, tanking and preventing tiles from cracking over time. Why don’t we take a look at some examples?
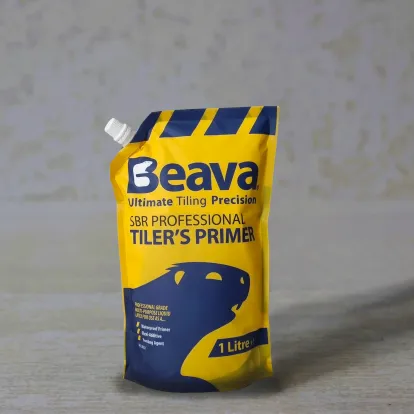
This latex-based solution makes tiles adhere easier and quicker, and it’s added as a step before applying your adhesive. This stronger bond between your tiles and substrates ensures that there is a much smaller chance of tile delamination developing (where tiles peel, lift or crack). If you want to make sure your tile installation has a long lifespan, this is certainly an unskippable step.
Coming with a lot of other handy benefits, this primer can be used for underfloor heating applications to make tile adhesion stronger as they become prone to expansion and contraction due to temperature changes. Its chemical compounds also make it useful for exterior uses and wet environments such as bathrooms, wet rooms and kitchens. Your tiles are sure to stay put for many years!
The Beava waterproofing kit is also another must-have when it comes to ensuring your bathroom or kitchen is completely waterproof. Not only does this kit feature handy tools such as a brush and waterproofing tape, but it also includes a quartz acrylic primer to prepare the surface.
The quartz acrylic primer literally contains thousands of tiny quartz crystals which creates a textured surface for tiles to grip and adhere better. Suitable for a wide variety of substrates, including limestone, cement, wooden floorboards, natural stone and many more, this primer is versatile for many uses and projects.
Take a look at our guide on why you should waterproof your bathroom with Beava! We’ll give you a breakdown on the importance of making your rooms with high moisture levels fully waterproofed.
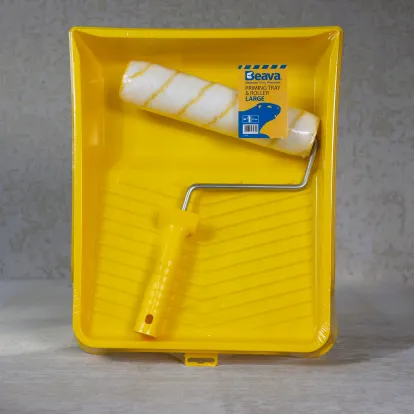
The Beava priming tray and roller is a really useful accessory to allow for the smooth application of primers. Making every job so much quicker, every tiler needs an accessory such as this one to spread primer evenly before tiles are laid. Available in large and small sizes and boxed in 5s, these accessories are must-haves for pro tilers and DIY enthusiasts alike.
Applying tiling primer is a lot easier than you may think - you don’t have to be a pro to create seamless tile finishes. However, if you are a complete professional in the tiling world, these useful tips may help you in making your jobs quicker and easier each day.
Step 1: Mix The Primer With Water
This step depends on the type of primer you’re using. For example, the bottle of the quartz primer (as included in the waterproofing kit) is half full, so you can go ahead and fill the rest with water, giving you a perfect mixture of equal parts water and primer. Give it a shake once you’ve screwed the cap back on since the quartz can settle at the bottom quickly.
However, the Beava SBR Tilers Primer requires a 1:3 mixing ratio (1 part primer to 3 parts water), providing coverage of approximately 40 m². You can use a heavy duty Beava Tub mixing bucket for this step.
Step 2: Pour Into The Tray
Once your primer is thoroughly mixed with water, you can simply go ahead and pour the mixture into the Beava Priming Tray. If you’re using the quartz primer, give the liquid in your tray a little swirl with your roller every time you dip it. This ensures you are picking up an even amount of gritty quartz crystals with every roll, rather than just rolling on plain liquid onto the substrate.
Step 3: Apply The Primer To The Substrate
Once you’ve mixed your primer and poured it onto the tray, you can apply it onto the substrate (providing that it is compatible with the primer). Use the roller for a smooth and even application and then let the primer dry before applying your waterproofing membrane or adhesives.
If the primer is not completely dry, it can ruin the bond between tiles and they will not adhere properly. Drying time depends on a number of factors, including your room’s temperature. For example, if you’re applying the quartz primer, a room temperature of over 15 °C with a relative humidity of 50%, the drying time is approximately 1 hour. By this time, the primer has hardened to such an extent that it can no longer be made soft by exposure to water and moisture.